
 At 4:03 a.m. on Jan. 7, 1994 the Northridge earthquake shook southern California awake, including the future owners of the Faces of the Moon project. Paula Jones was about to slap President Clinton with a lawsuit, and movies–for us Forrest Gump and Four Weddings and a Funeral– cost $4.00. On TV it was Seinfeld, and later that year, OJ Simpson fleeing the police in a white car in heavy traffic for what seemed like forever. This was our entertainment for the final year of Faces of the Moon.
That January I was working on translating some photographs—provided by our client, of a wave coursed roof in Carmel, CA–into miniature reality on our imagined toymaker’s workshop. In October, Noel would finish up the final 2” of shingles while I wrote my Nutshell News column for March 1995, noting that, “shingling is a true test of persistence, and one’s sense of humor. Eight months ago I wrote to Melanie, our ever-patient client, that I was “inching up” on the wave coursing, confident we would be done by Easter. Today, a smoky-gray October day, we are nearing the top, and hope to be finished by Thanksgiving.” Granted, from May through September we also had workshops to prepare for and teach, but the balance of my months were swallowed by this undulating, textural, time-consuming and gorgeous process called wave coursing.
As noted in my last entry, miniature shingles (1/2”wide X 1”deep X 1/32nd thick) would normally be spaced in ½” deep courses (horizontal rows), or two courses per vertical inch. Wave coursing in scale needs six rows per inch, or roughly three times the normal amount. Multiply that by 550 sq. in” of roof, and that’s a whole lot of shingles (No, I never counted).
So why commit to triple the work? Well, because we liked them, and we’d never done them before. There’s a kind of magic about the way the subtle, organic waves of shingles help blend together all the other elements, without drawing undue attention to themselves. Plus, it’s such a romantic way to roof a house, especially an imaginary toy shop in a time-warp
Noel’s original design for the project incorporated Anton Pieck paintings of Olde European buildings (say, 400 years old), wattle-and-daub construction, along with Disney, and Carmel, CA elements. As it is doubtful a 400 yr. old building would have had wave coursing–we were asking the viewer to accept the illusion that this roof fits on a structure that exists in a later time, but also an imaginary time. Our job was to supply enough clues and craftsmanship to make this all come together.
To stress the look of 400 years of aging, Noel designed sag into the roof structure. He swayed the back, or ridge, of the roof. And he added a bulging eyebrow window—to emphasize the swells of the wave coursing—and broke the hips and rounded the gables and overhangs for the same reason.  To apply this to the structure, he made a poster board model, using eyeball geometry. He started with the larger shapes, taping them in place, then began to fit in the smaller sections. It was like a cheater’s jigsaw puzzle, where you can alter the shapes of the pieces until they fit the hole.
With these pieces as patterns, he then cut and sanded the 1/8” plywood that would make up the final roof. Each section was glued (Elmer’s) and nailed (5/8” brads) in place, and then taped down to let the whole thing dry. For the curved gable and eave ends, he scored the underside of the ply so they would take the desired curve.
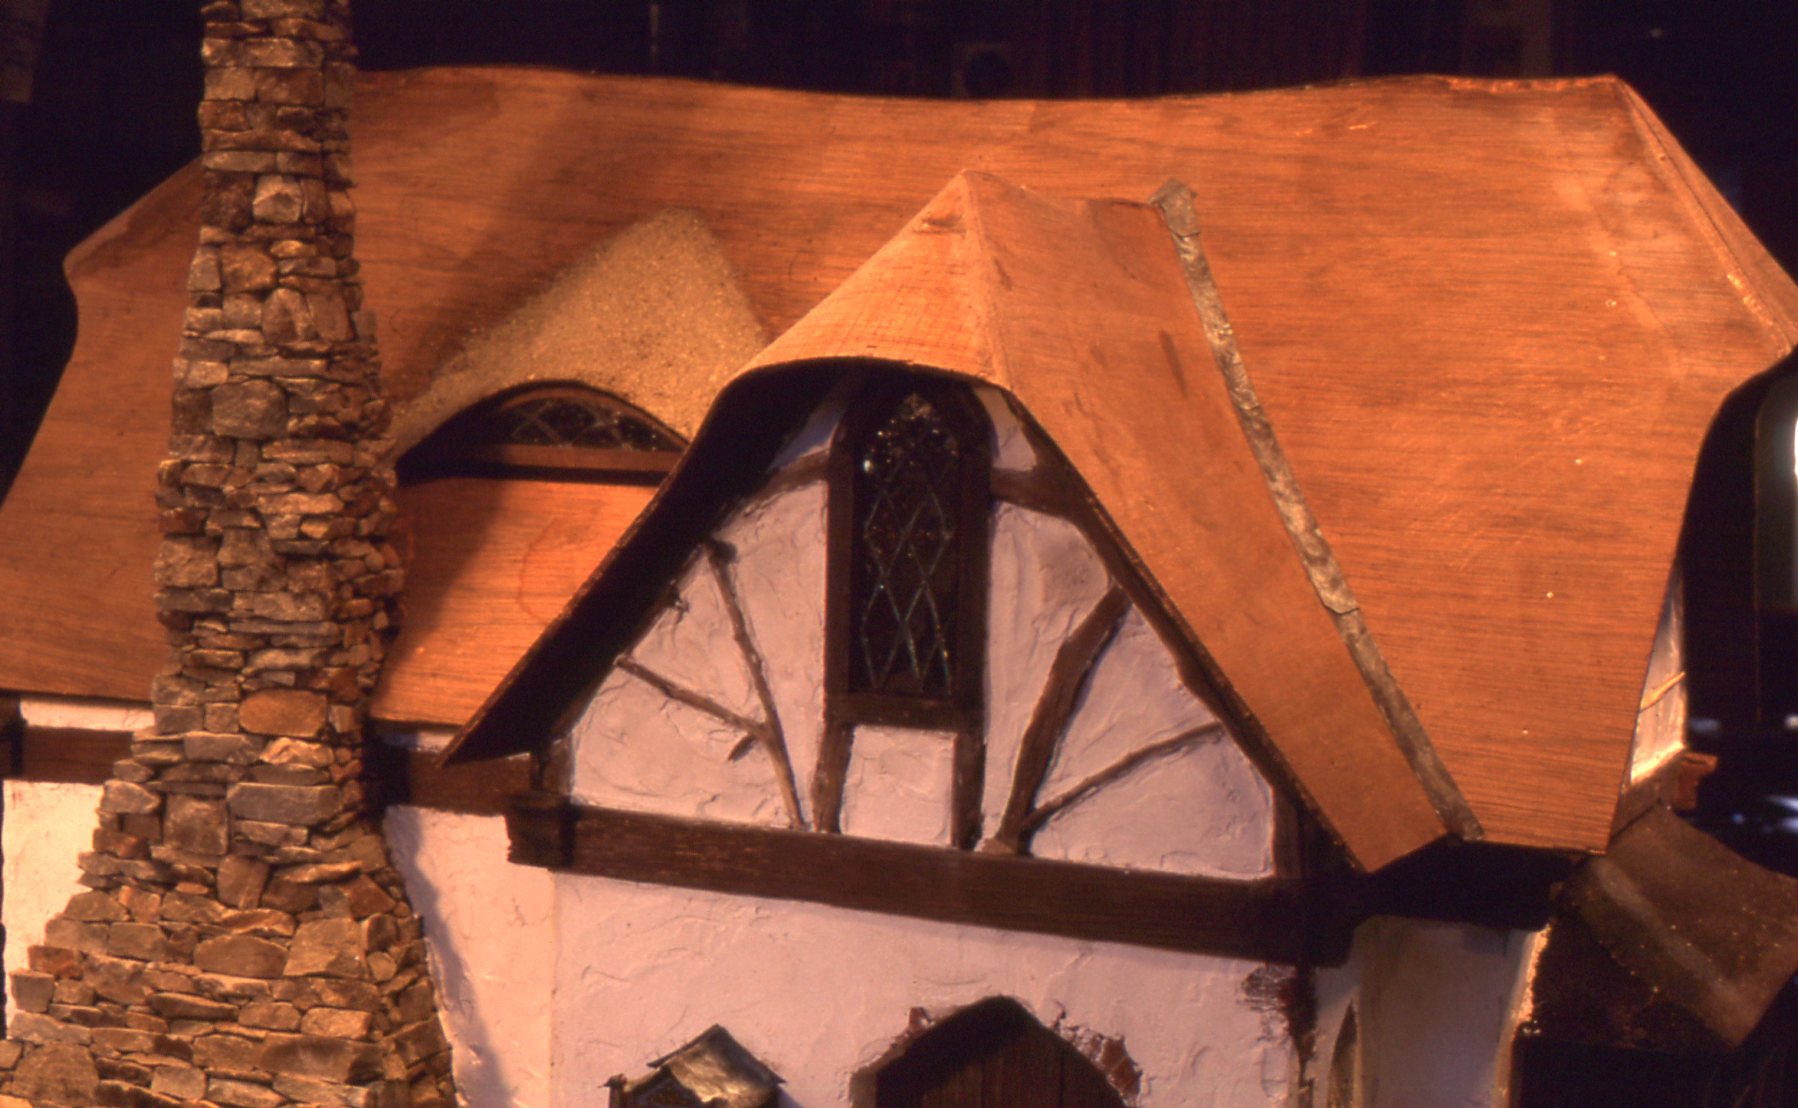
The Elmer’s painted over the eyebrow gives it that white color, and you can see the score marks in the ply over the eave end. The flashing in the gutters is rolled-out and aged wine bottle lead.
Concerned about the weakness of the scored sections, Noel “painted” the eaves with successive coats of Elmer’s, building up a 1/16” glue thickness around the curve and into the joints of the adjacent roof sections.
To further enhance the wavy quality he was seeking, he built up a rise over and behind the eyebrow window. He did this with a “putty” made from sawdust and Elmer’s, mixed to the consistency of tuna salad, then spread it on with a putty knife, and molded it with his hands. He also used a utility knife to carve a deeper sway into the already curved spine of the main roof.
Then it was my turn to start shingling. As with all our shingled roofs, I began by gluing down a series of narrow strips of scrap wood (about 1/32” X 1/32”) along the lower edges of each roof section. I call these “lift strips” because their sole purpose is to lift the lower end of the first row of shingles. This lift is necessary to establish a slant for the first row, and all ensuing rows of shingles. Otherwise the second row of shingles wouldn’t lie flush against the first.
Rather than cut down our 1/32” mahogany veneer shingles, I started sheets of the shingle stock. Using a T Square and utility knife I could quickly and easily cut the veneer into strips 1” deep X 6” long (the width of the stock).
The challenge was getting into the “swing” of the undulating roof. I started at the back, with the least obvious section. For the first row I laid down a straight veneer strip on the roof, and with a dark lead pencil, drew on it the bottom curve I wanted. I then cut that waveline with scissors, and laid the now wavy strip against the roof to see how it looked. Once satisfied with the shape, I used an X-Acto with a #11 blade to cut shingle #1, approx. 3/8” wide, from the strip. I then ran a thin strip of Elmer’s along the top and bottom of the shingle, and glued it to roof. I continued with more of the same across the first row, leaving a tiny space between each shingle so my labors wouldn’t look like a single strip of wood.
For the second row I repeated the process, with some additions. Once I had cut the desired curve into the shingle strip, I then traced a penciled guideline of the curve onto the glued-down row beneath. I also traced a straight line at the top of the strip, onto the roof, to help keep my shingles lines horizontal. In the process I discovered that, unlike the uniform width of conventional shingles, these looked better if they varied in width from 1/8” to 5/8”.

Here I’m using tape to hold the shingles in place around the curve while I cut the next shingle.
Then the job got interesting, because, to achieve the flowing, free-form look, each new row required a slightly different curve from the last. I learned that the spacing and curves weren’t random; each row needed to visually relate to the last. And the longer the row, the more undulations, and relationships to undulations were required. To further augment the feeling of waves, every few rows I lifted the top or bottom of a curve by shimming it with thin strips of shingle trims. This added an eye-pleasing bulge and unevenness to the waves.
Because the spacing between rows needed to vary “naturally,” and because I needed to lay six rows per inch, the depth of the courses (or rows) ranged from a hairline to as much as ¼”. Then, to reduce the thickness of the built-up layers of shingle, each row had to dry and be sanded back to a taper before adding the next. Mostly I had to go by feel, rather than ruler, and learned to appreciate what a great job Mother Nature does with her waves.
As I worked my way up, I got into the eaves and eyebrows, which required each shingle to be shaped into a little pie wedge. Each day I had to develop a rhythm, a feel for the process. Some days I had no rhythm at all and just had to quit. The worst days were when I chipped out the work of the day before because I didn’t quit in time.
Early on, Noel and I had worked out how to work together—if there’s trouble with the other person’s work, don’t say anything. Eventually the one tripping up will become aware, and ask for an opinion. Even then, the rule was not say it, but throw the question back—What do you think? By that time the one in trouble already knew.

This shows how the thickness of the overlapping rows can get tricky.
On the best days everything came together and I could see encouraging results by supper time. I do confess, though, to bottoming-out at the top, where even the depth of every shingle had to be trimmed to fit—my mind said, “Enough!” That’s where partner work pays off. Noel was ready for a break from wattle-and-daubing, or whatever he was doing, and wanted to try his hand at wave coursing.

Completed roof before aging.
 Then it was on to what we’d been working toward all along, the aging, adding years and weather by sanding to smooth, then wire brushing to accentuate the grain. Next, we applied a coat of Bug Juice to darken it, then worked in a dilution of household bleach and water, about 50/50, which softened the appearance of the whole roof, and added a tinge of green. More Bug Juice to darken what the bleach had lightened. From there we fiddled until it looked right—more steps than I can remember. In a month we would be off to California with our delivery–#50–with the next project already in mind.

What a wonderful crazy process with great results!
Linda, It definitely was a trip!
C’est magnifique, le toit est très réussi !
Merci!
Pat, I loved the wave coursing. I would love to hear in a future post about the lead paned window in the gable. Best wishes from Barbara Brear in South Africa
HI Barbara, Thanks. If I don’t get around to stained glass technique anytime soon, I wrote about it in detail in the Nov. 1994 Nutshell News. Maybe somebody out there has one they’d be willing to copy for you.
This is truly amazing!
Thanks!
Only the TRULY dedicated would take on such a task!! What a glorious piece of work! Love it!!! Barbara Ann