

Interior mock-up
The customer for Frosty was an avid fan we could never say no to. She liked our work so much she built a room over her swimming pool (the same pool we and our dog swam in on previous deliveries) to house her ever-expanding miniatures collection, including our houses. When it got to Frosty, she knew we were beginning to tire of the work, but this was such an idiosyncratic, funky building there was no question as to whether or not we’d do it. Plus the story of it being their first restaurant and, the photos of the post war era were heart-grabbers.

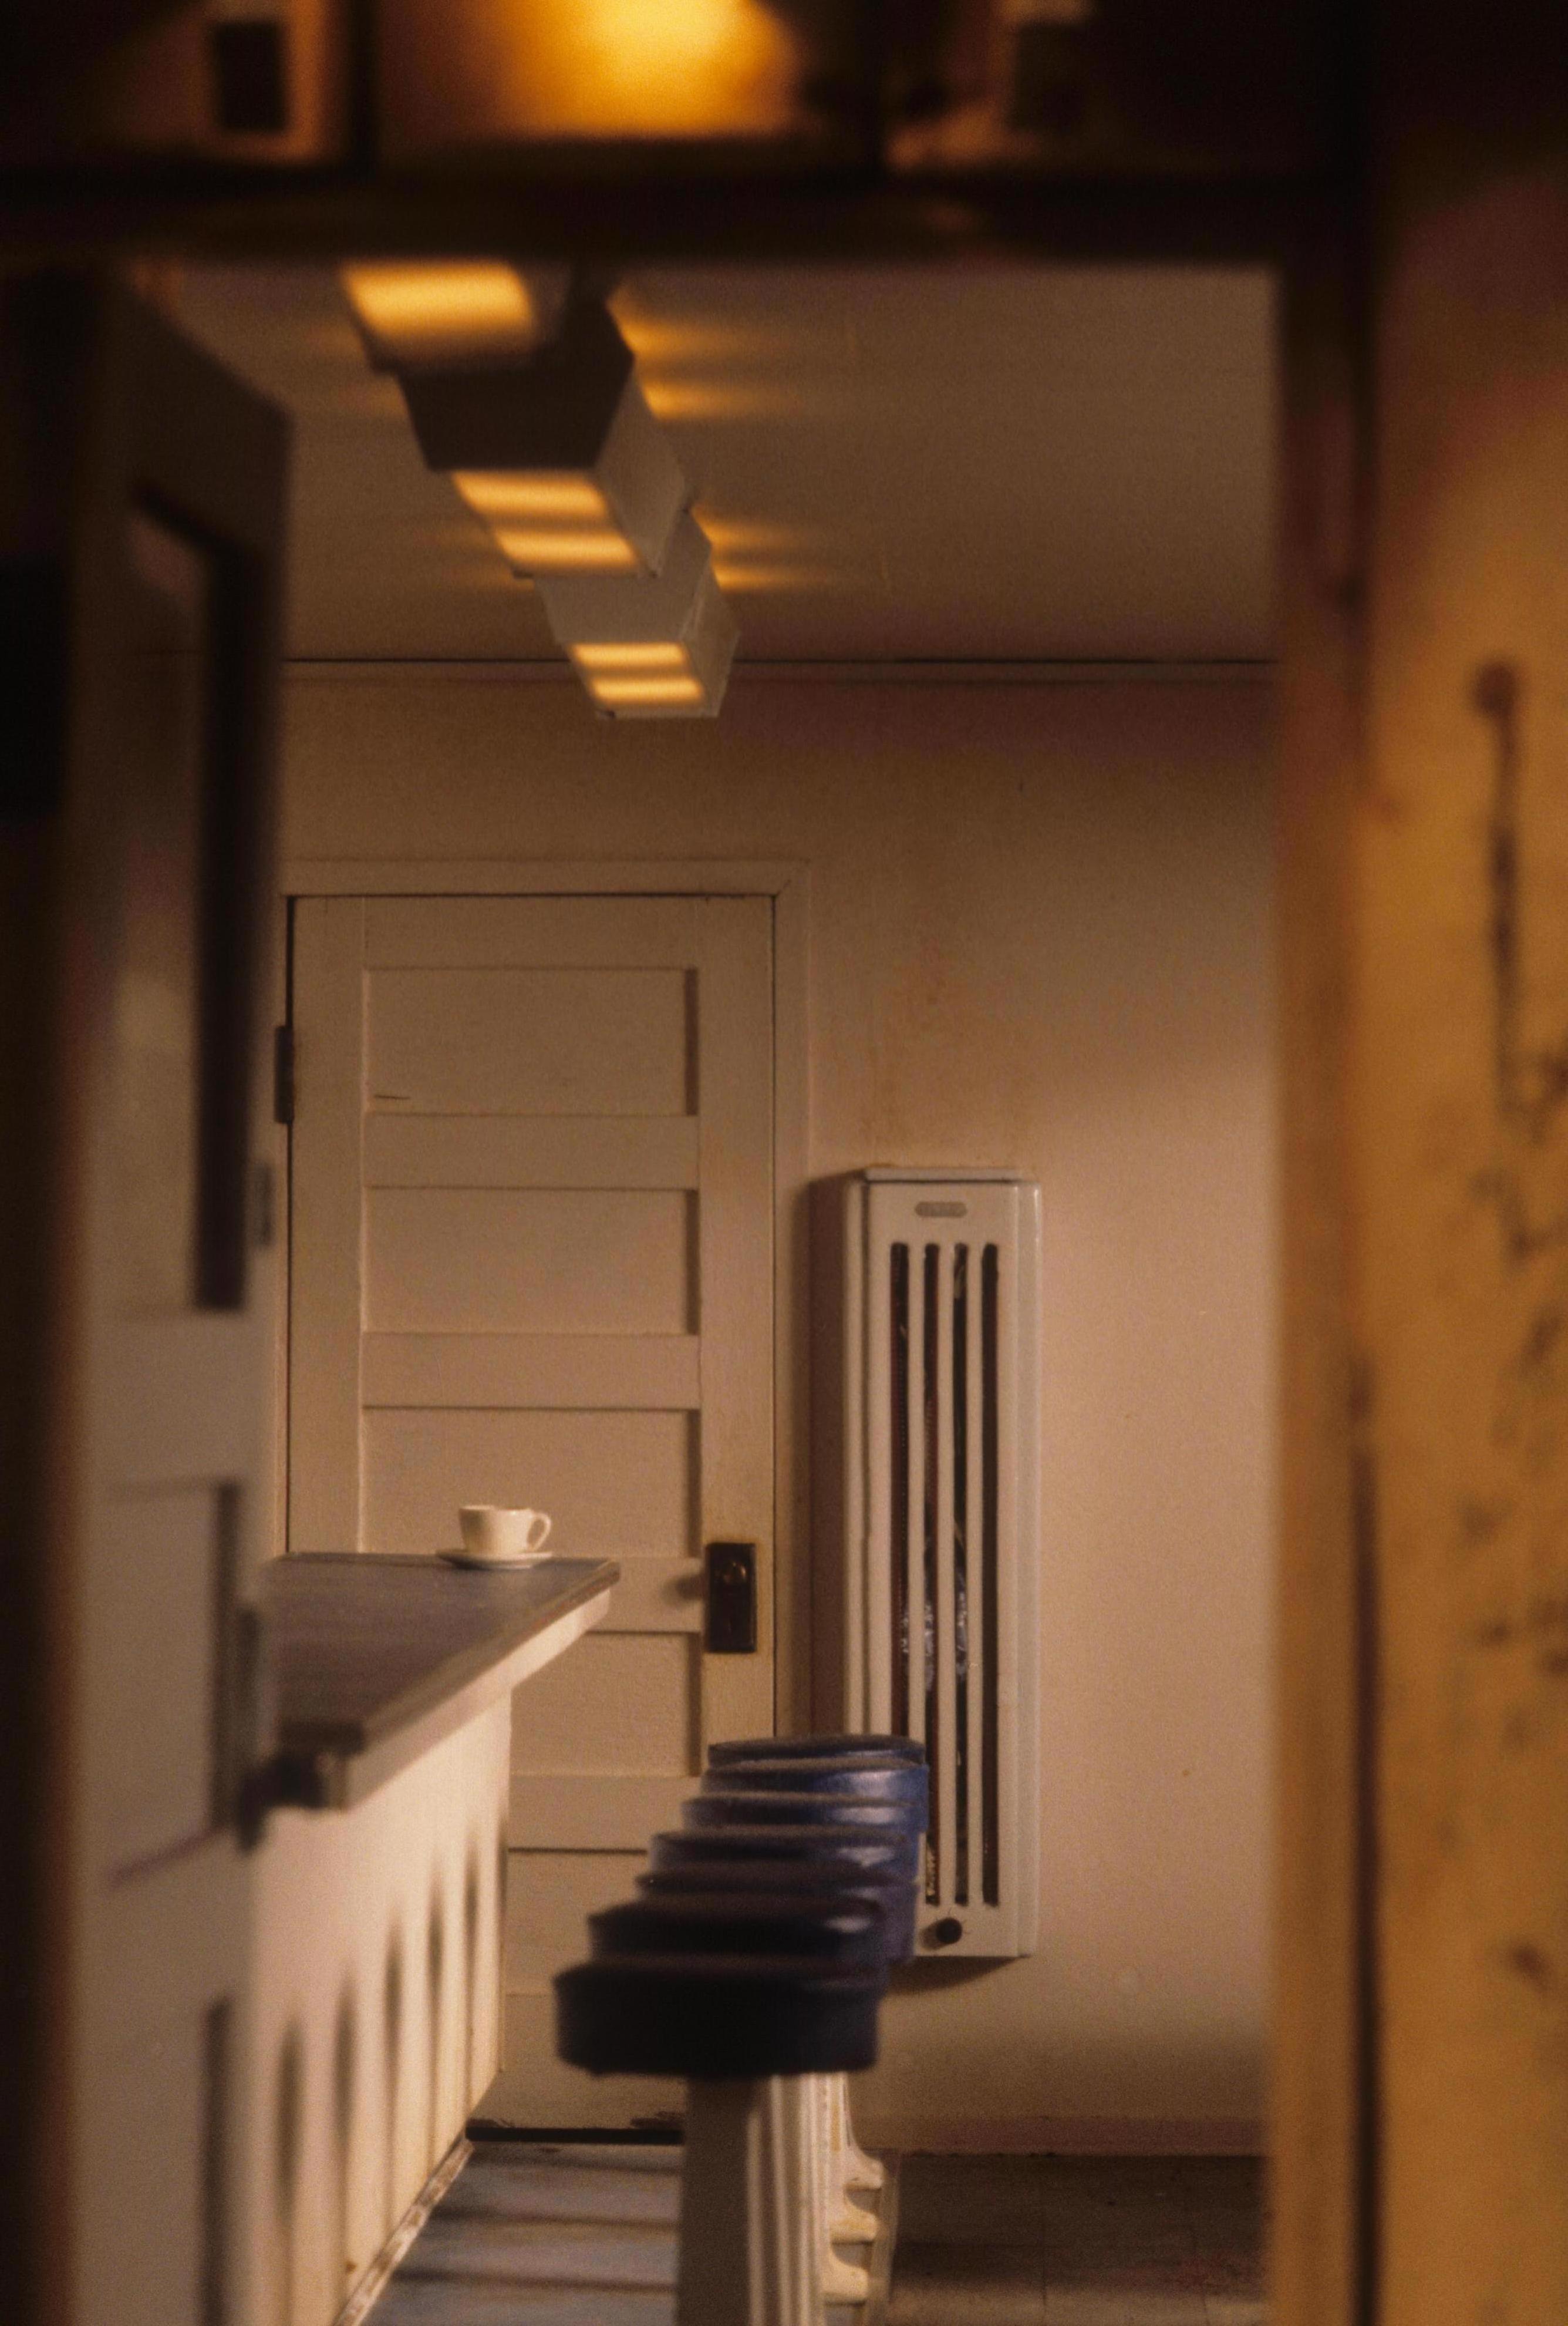
Behind the kitchen counter looking toward the front. Duckboards on the floor.
One of my favorite minor details was the duckboards on the floor behind the counter, reminding me of the summer during college when I fry-cooked at a small snack bar on the Massachusetts coast. I love the name–duckboards, those springy slats on a framework that helped keep your legs from tiring while standing for long hours. Plus, spills could slide between the boards so the cook wasn’t skating around on the mess. They come in sections, for easy removal to take outside and hose off every week or so, and, maybe, to scrub the floor beneath. In miniature they are easily made of aged (Bug Juiced) 3/16” X 1/16” wide basswood strips glued over framing slats of the same width. Frosty’s duckboards are barely visible, but they’re so characteristic of counter restaurants we couldn’t leave them out. Plus they add another visual treat for the mind, if you should happen to see a corner of them. And, yes, there were stains on the floor under the boards.
Noel’s art director’s eye picked up on the utilitarian black electrical outlets lining the cream-colored walls—one of those little visual tricks to suck you into believing this is all real. Part of it was remembering how the light switches in the Greene & Greene house had subtly brought the rooms alive, though probably few recall seeing them. He made the outlet plates from thin black plastic sheeting. The plug receptacles were then indented into the plastic with a nail set, and the plug holes made with the tip of an Exacto blade. The plug itself was made with a small wooden bead, cut in half, painted black, and glued to the receptacle. The cord was a length of miniature electrical wire—one end glued into the hole of the “plug”, and the other end into the appliance. And each of the appliances—the malt blenders, toaster, coffee warmer, etc–would have black cords leading to the outlets. The mind could believe an appliance worked if it was plugged in.
 The “stainless” counters and sink were wine bottle leads, rolled out flat and glued to the wood counters. The “stainless” counter edging is a trip of 1/16” basswood double bead painted silver—it’s all an illusion!
Building appliances like the fridge, hotplate and coffee warmer is far too weird and detailed a subject to cover here. Suffice it to say, they were the products of our endless drawers of miscellany, auto primer, and Noel’s deviant (and, I might add, broccoli-stoked) mind. I touched on the subject in the July 1990 issue of Nutshell News, if you can find a copy. For smaller items like the syrup dispensers we found useable look-alikes from Metal Miniatures’ white lead selection, and inventing bases, or adding jewelry findings as needed. The malt machines were also re-worked Metal Miniatures, mostly filing off the excess casting sprue, painting them 40’s green, and adding a straight pin for the blender rods. The customer supplied the wonderful napkin dispensers, coffee carafe and mugs from her collection.
Gas wall heater and neon flourette details

Window view of ice cream machine
The vertical log exterior façade is the anomalie of the structure–the rest of the building was built in traditional horizontal log fashion (which, to save time, we took artistic license with by turning into board & batten). By 1946–the project’s time-frame–the bottoms of Frosty’s logs had rotted and were filled with cement, roughly in log shapes. For our logs, we spent an afternoon at the mouth of the Columbia river searching through huge, washed-up swirls of driftwood for logs of the right dimension and knottiness. We were rewarded with a supply of miniature replicas, almost knot for knot, crack for crack. They were cut and glued in place over the front plywood walls, and the “rotted” out bottoms filled with Bondex patching cement. 
Another oddity of the front was the upside down doorknob plate, with the keyhole over the knob. I doubt many have noticed it, but it is part of the character of the building.

The utility side of the building and alleyway
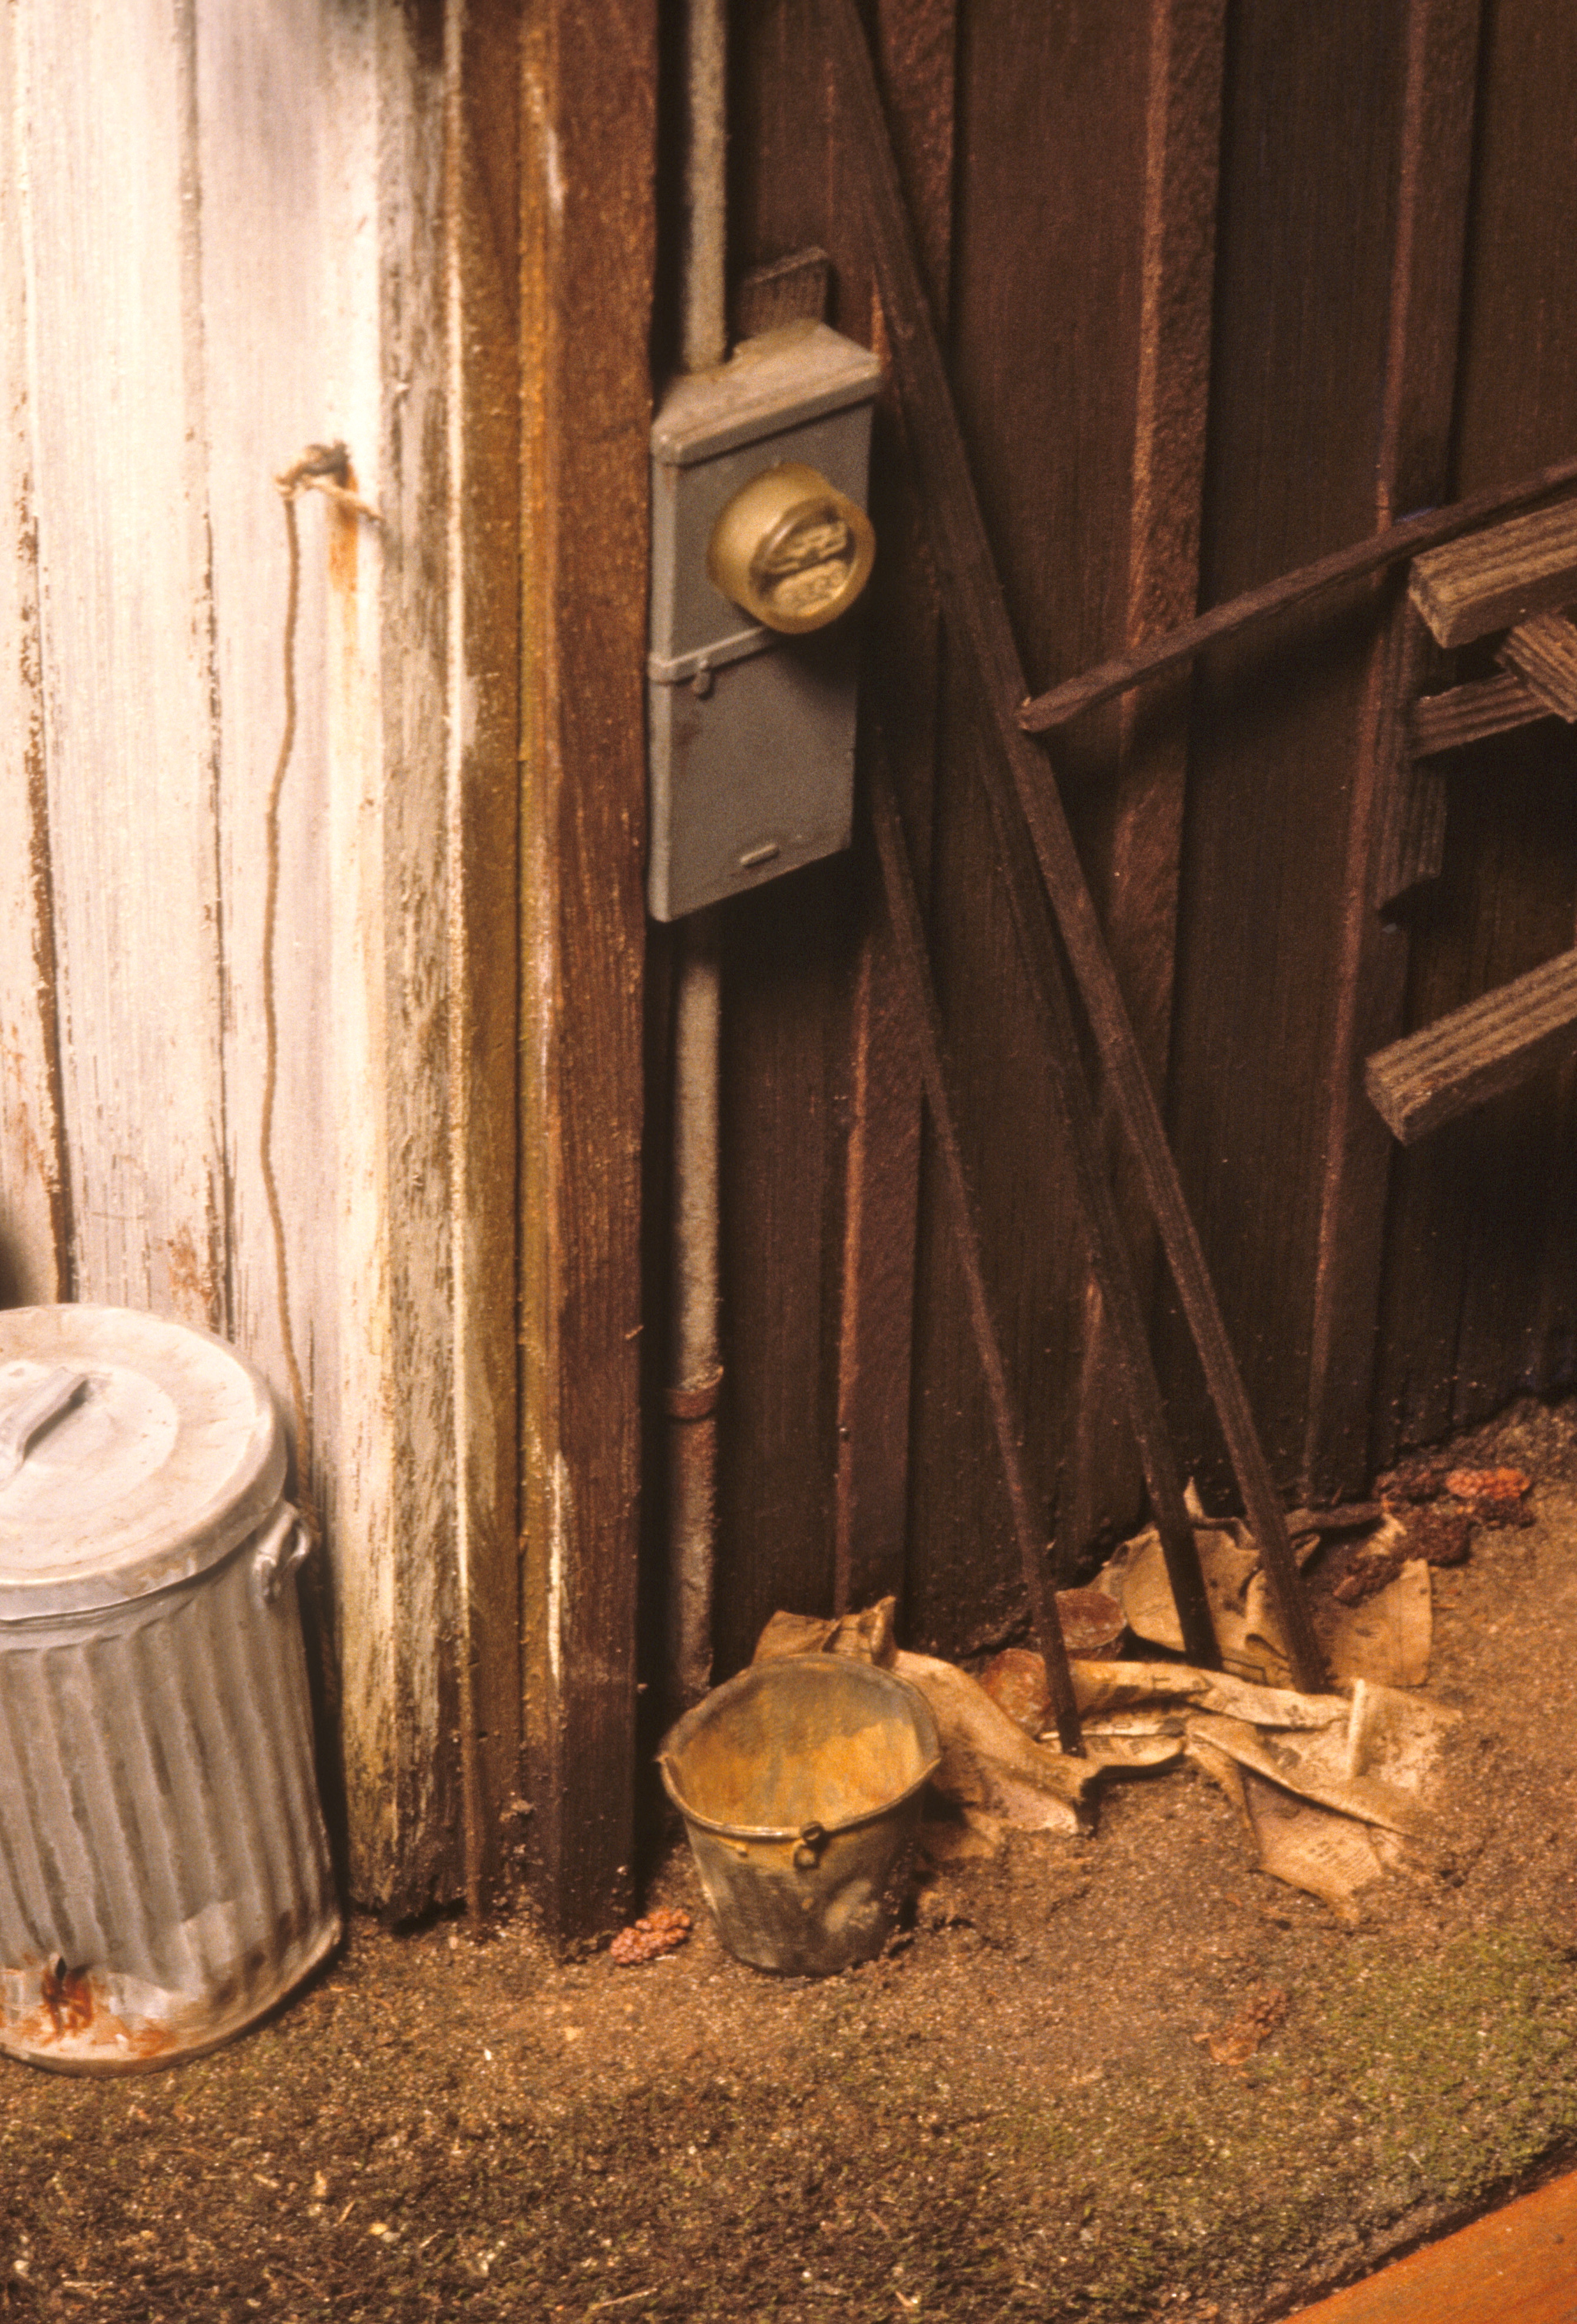
Utility pole detail

Board and batten wall behind booths
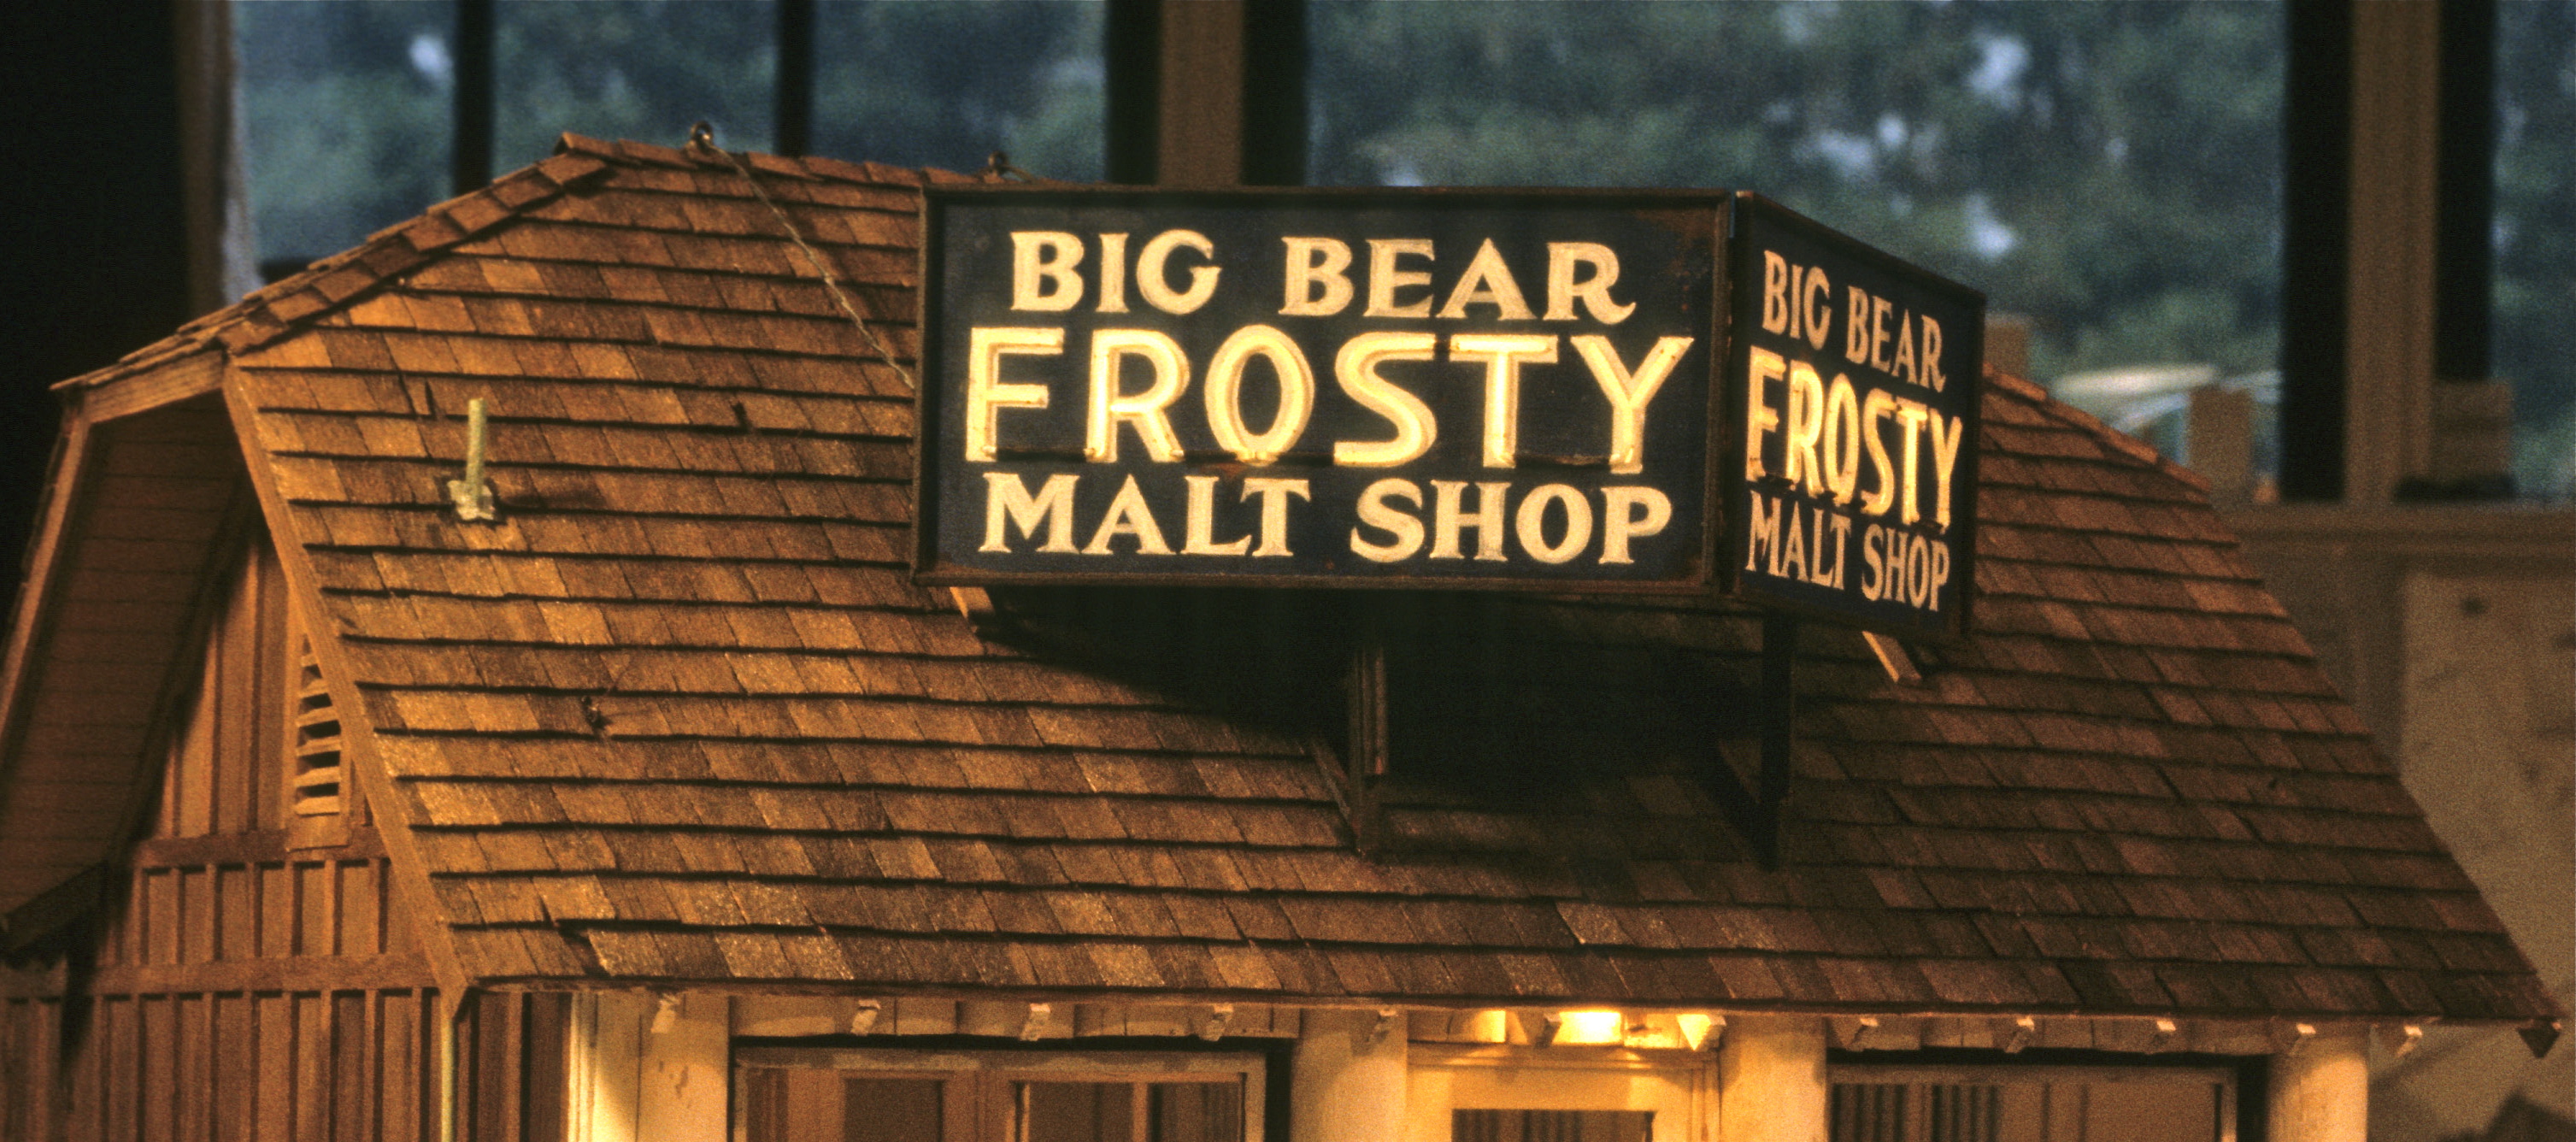
Frosty roof neon
The miniature Frosty is its own little museum of details, but the last I’ll talk about is the crowning glory neon sign announcing BIG BEAR FROSTY MALT SHOP, with the word FROSTY in neon. For this, Noel would build, two metal light boxes, joined at a 22 ½˚ angle, with the light shining through the carved-out letters of Frosty and some clear tubing that would look like neon. To achieve this illusion, he had the FROSTY letters photo-etched, in duplicate, in brass sheeting the size of the signs. Once we had the etched plates, he painted them blue, and hand-lettered on the BIG BEAR and MALT SHOP type with white acrylic paint. For neon, he tried fiber optic tubing, but wasn’t able to tame it into realistic script (the tubing has “memory,” wanting to uncurl into its original form). Living in salmon country, he then looked for fishing line, but couldn’t find any of the right diameter. The ingenious woman at the bait shop suggested Weed Eater filament (it’s always good to ask an “outsider” for help). Noel was able to form the filament into script, letter by letter, by heating it with a candle. A plus was its milky translucency that softened the light passing through it. He then glued translucent drafting plastic to the back of the sign–to further diffuse the light that would come from the back–and glued the filament on top of it, through the lettering slots, with Super Glue. Because the line was thicker than the slots, it protruded from the front of the sign the way neon would. He painted the connectors between the letters in black, as in real neon, and faked some tubing clips with silver paint. From there it was a matter of building and aging a framed box to hold the metal plates together, as well as to house the miniature flourette (miniature “florescent” tubes) fixtures that would light the letters. Once assembled the whole thing was attached with simulated iron brackets of basswood, and guy-wired to the roof. The power cording was then twisted loosely to resemble heavy-duty exterior wiring, then draped over the rooftop and back to the utility pole, with electrical meter, and then down through a hole in the base to the transformer. For more specifics on the sign, and the rest of the project, you’ll need to find a copy of the October 1991 Nutshell News.
Finishing the project meant having a party to show the friends we’d ignored for months, then packing it up in the van for the long drive to southern CA. By then we were shipping most of our work, but because this was such a personal project for the customer, we wanted to be there when she first saw it. When we saw that initial spark in her eyes, we knew we’d done it right.

Back door detail

Amazing!
I love the background stories but have to admit that I have tried to burn into my brain every detail of of the building techniques you share. You are both one of a kind.
Every time you post, I sit for an hour utterly speechless……..
Thank you!!
As always, I am blown away by the tremendous amount of thought, creativity and hard work that you folks have put into these projects. This is the dedication and skill that makes you such masters. Thanks again for sharing the story.
Oh, and I never thought I would ever have anything good to say about weed whacker line hahaha!!!!!!!
Amazing detail – it really does look just like a 1:1 malt shop. I can’t believe little pieces of cast white lead turned into such realistic appliances!
You know, if you can find the basic form of something ready-made, even in white metal, and have a good supply drawer, you can make almost anything work.
I want to sit and have a frosty here! This place looks like it’s full of memories: teenagers meeting after school; long-marrieds reliving their youth; perhaps lovers meeting secretly.
It’s truly wonderful.
Just found this by accident and think you and your husband are miniature geniuses. It is awesome to look at in pictures and I can’t imagine seeing them in actuality.
Thanks! Glad to hear you like our work.